|
Epson SureColor P6000 & Stylus Pro 7880
Download the SureColor P6000 driver here. Download the Stylus Pro 7880 driver here. LOADING PAPER Roll Paper 1. Open the roll paper cover. 2. Push down the lock lever completely and move the roll paper holder to the left. 3. Flip the tension levers up on the roll media adapters. Push the adapters into the paper core at both ends of the roll, then push down the tension levers. |
|

|
|
|
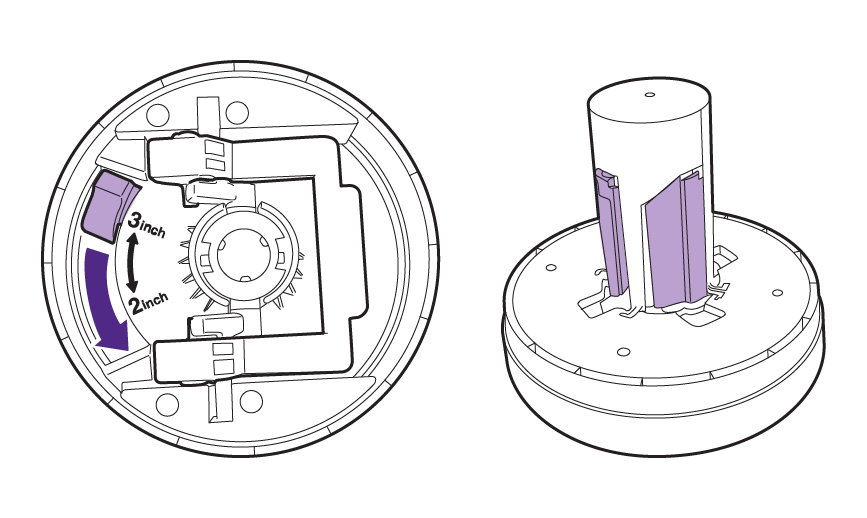
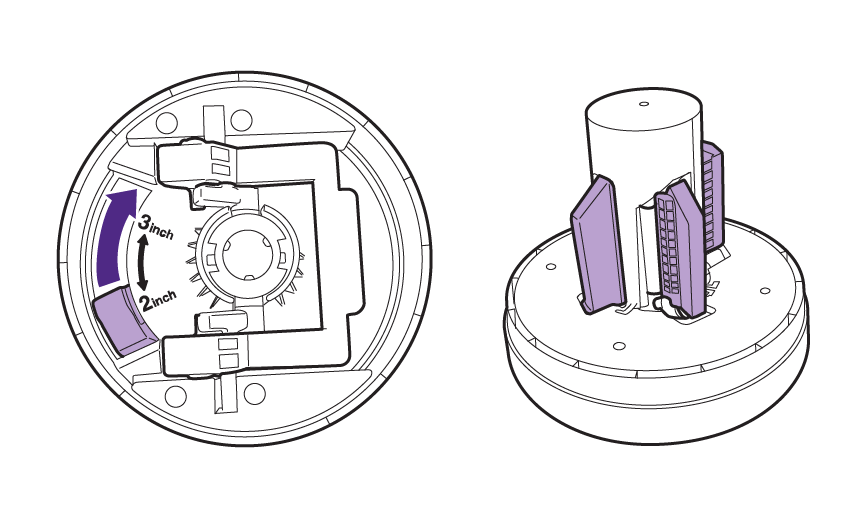
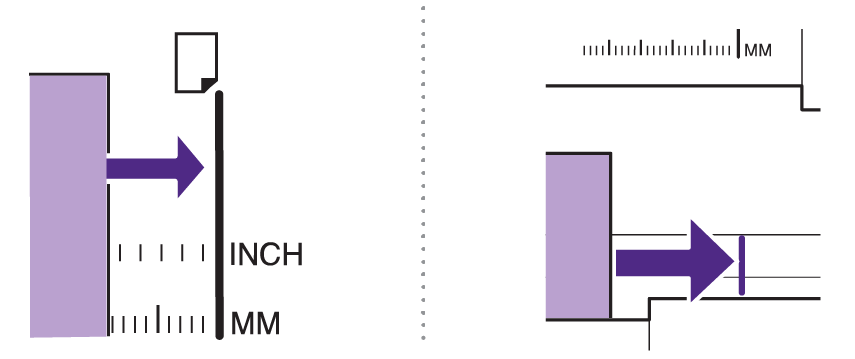
To adjust the roll media adapter to fit the roll’s core size,
slide the tabs accordingly: |
|
|
2-inch Core:
|
3-inch Core:
|
|
|
|
|
|
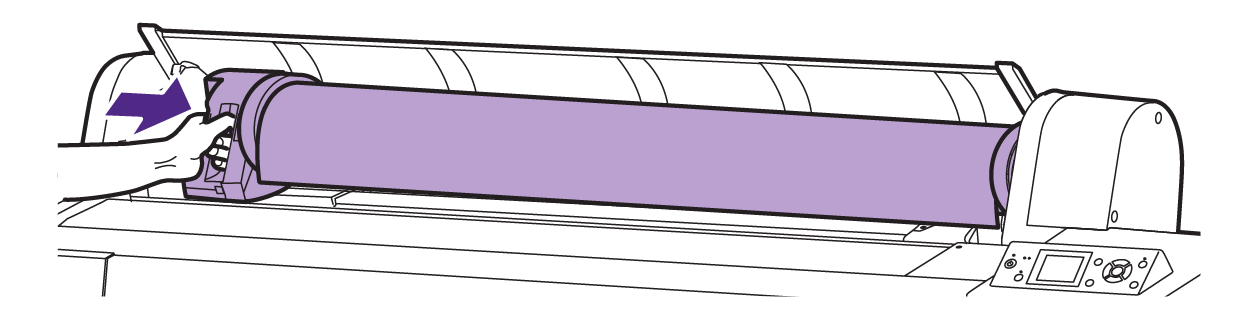
4. Carefully place the roll in the printer, with the lip of the
paper facing outward. 5. Slide the left roll paper holder to the right to secure it. |
|
6. Pull up the lock lever to lock the roll in place.
7. Feed the paper through the printer and pull it down until the edge of the paper is flush to the center of the stand. 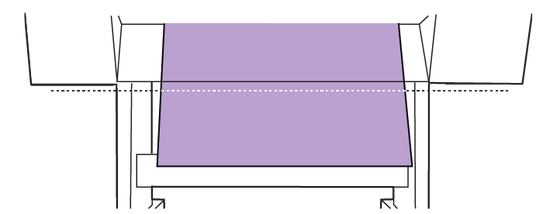
8. Close the roll paper cover.
9. Press the Load Paper button and wait for the printer to say it’s ready on the screen. CUT SHEET
1. Remove any roll paper from the printer and store carefully. 2. Close the roll paper cover. 3. Press the Paper Source button, select Cut Sheet and press the OK button. 4. Feed the sheet into the right side of the paper slot and align it with the vertical lines either on the roll paper cover (for sizes A4 and up) or underneath (for smaller sizes).
*Always load cut sheets in portrait orientation.
5. Press the Paper Feed button screen to finish loading the cut sheet.
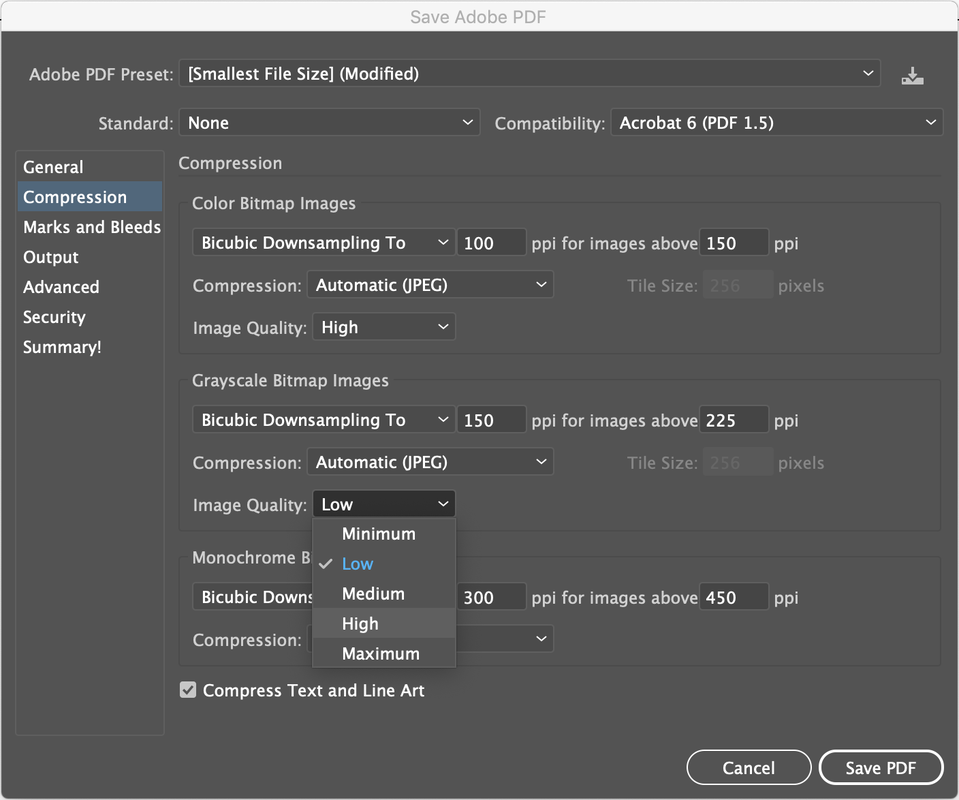
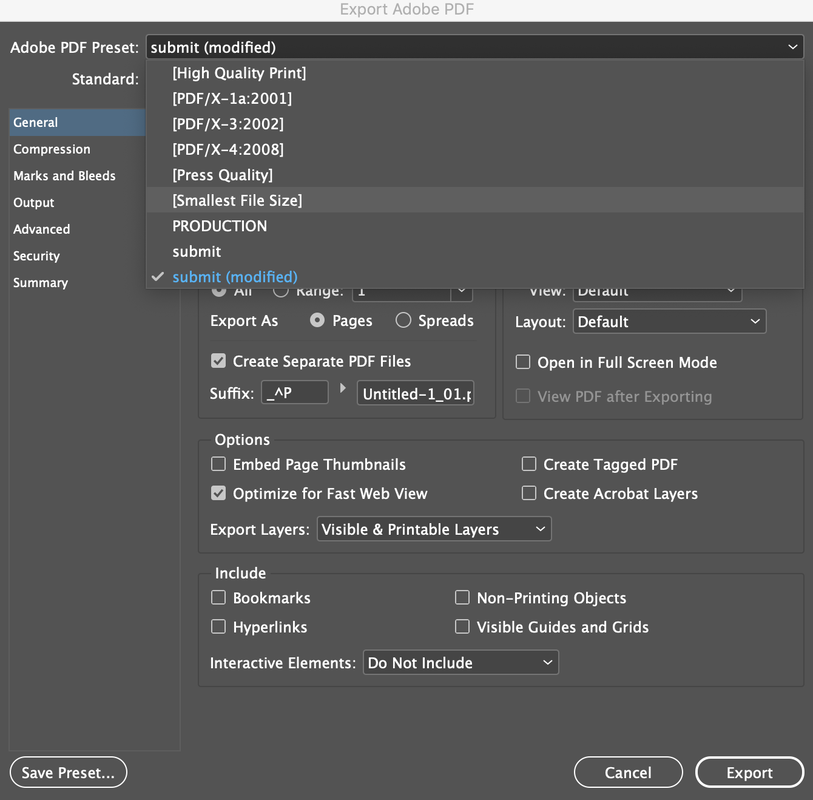
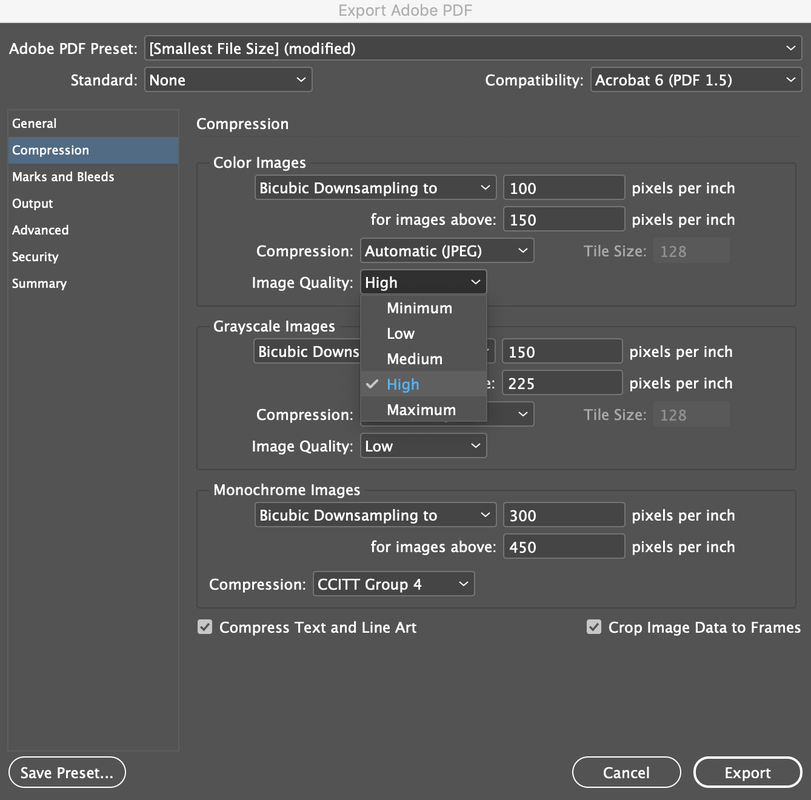
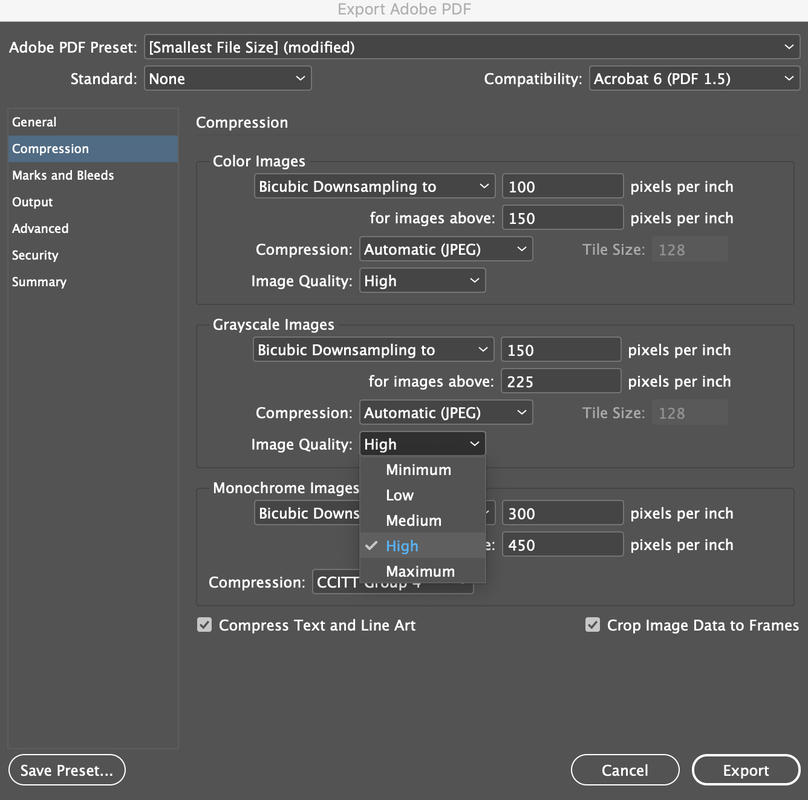
PRINT SETUP
Windows 1. Select the Print command in your application. For Adobe applications, you would need to select Setup... to get to the next steps. 2. Select the Media Type that is the same as the paper loaded. 3. Choose the quality option that matches the print quality you want to use with the Print Quality settings. 4. Choose a color management option as the Mode setting. 5. Select the Source setting that matches the paper feeding method you are using (e.g. Roll Paper or Sheet). 6. Select the size of the paper you loaded as the Size setting, or select the User-Defined setting to create a custom paper size. 7. Print. OS X & macOS 1. Select the Print command in your application. For Adobe applications, you would need to select Page Setup... to get to the next steps. 2. Select the size of the paper you loaded as the Paper Size setting, or select Manage Custom Sizes to create a custom paper size. 3. Change Preview to Printer Settings from the drop-down menu so you can access the following settings: 4. Select the Media Type that is the same as the paper loaded. 5. Choose a color management option as the Color Mode setting. 6. To fine-tune the print quality, change the Output Resolution settings to fit your needs. 7. Print. REMOVING PAPER
Roll Paper 1. Open the roll paper cover. 2. Press the Load Paper button to release the paper. 3. Push down the lock lever completely and move the roll paper holder to the left. 4. Carefully remove the roll paper from the printer. 5. Pull up the tension levers on the roll media adapters and remove the adapters from both ends of the paper roll. 
6. Properly store roll paper for later use.
Cut Sheet 1. After printing, cut sheets stay in the printer. To remove the print, hold the sheet and press the Paper Feed button. REPLACING INK CARTRIDGES 1. Have your replacement cartridges ready before you begin. New cartridges should be immediately installed after removing old ones. 2. Press the Open Ink Cover button. 3. Open the ink cover after it unlocks. 4. Press on the ink cartridge to be replaced so it pops out slightly, then pull it out. 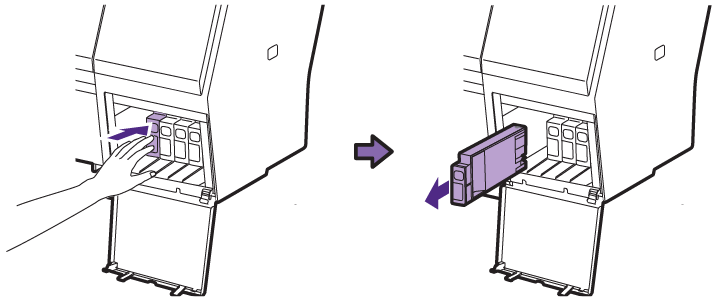
5. Remove the new cartridge from the package and gently shake it for about five seconds.
6. Insert the new cartridge with the arrow facing up and push it in until it clicks into place. COMMON ERRORS AND SOLUTIONS
|
|